


Animating a Female Walk Cycle ( Production Assessment A )
General / 24 July 2023
I was searching for a suitable video featuring a woman walking, which I could use as a reference for my animation. After spending considerable time on YouTube, I finally found an ideal example that perfectly matched my requirements.
I paid more attention to the details of how women and men walk. I saw their bodies have different movements and adjustments during the walking cycle. Compared to men, women's hands and legs move more gently, and their buttocks area changes shape differently.
Then I download a free female Ultimate rig from the internet.

The position of the hands is crucial in a key pose. To begin, I created a relaxed pose for the character's fingers.

I found a helpful resource in "The Animator's Survival Kit" book. Using its guidance,
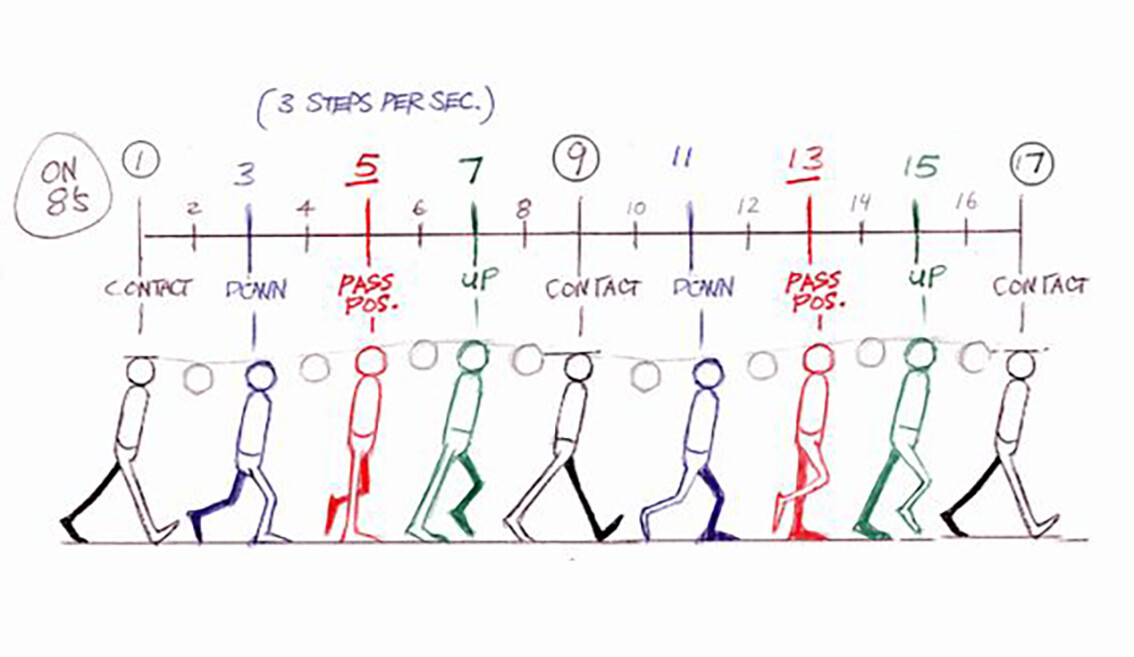
I put the keys on the frames. For contact poses, refer to frames 1, 16 (the opposite of frame one), and 32 (a duplicate of frame one). For downs poses, refer to frames 4 and 19. And for the Up poses, refer to frames 8 and 24.


Lighting

Animation Library
General / 10 May 2023
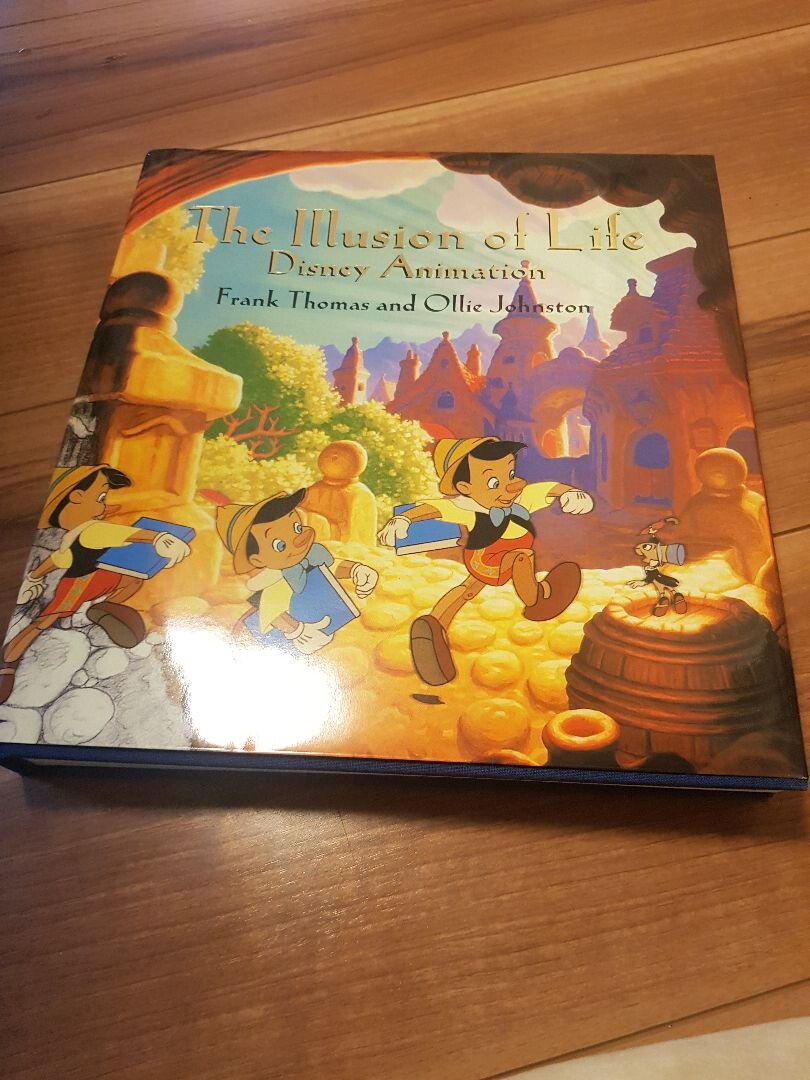
The Illusion of Life: Disney Animation
Ollie Johnston and Frank Thomas
The Animator's Survival Kit
By Richard Williams

Acting for Animators
Ed Hook

Timing for Animation
By Harold Whitaker and John Halas
Stop Staring: Facial Modelling and Animation Done Right
By Jason Osipa
Planning Character Animation: 3D-2D
By Wayne Gilbert
Character Animation Crash Course!
By Eric Goldberg

Storyboarding: Turning Script to Motion
By Stephanie Torta and Vladimir Minuty
Ideas for the Animated Short: Finding and Building Stories
By Karen Sullivan, Gary Schumer, and Kate Alexander

The Art of the Storyboard: A Filmmaker’s Introduction
By John Hart

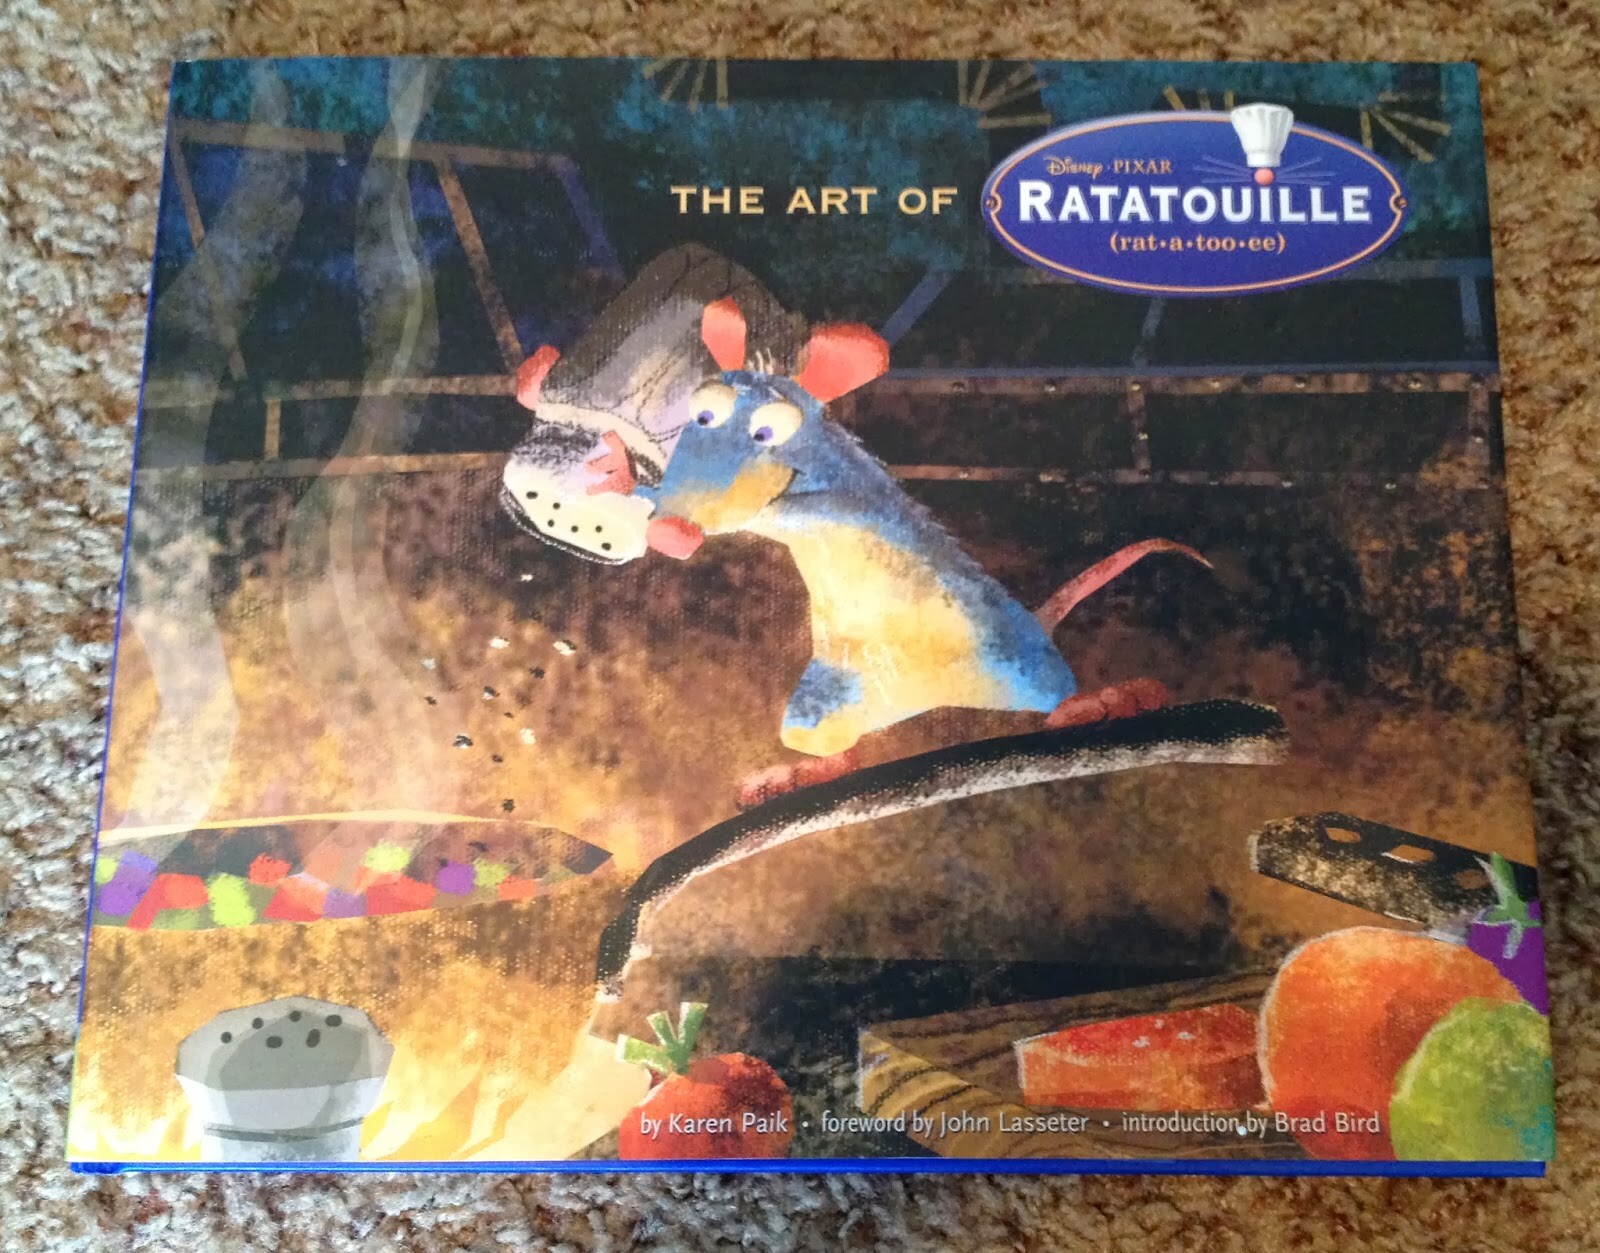
The Art of Ratatouille
By Karen Paik
Pixar Storytelling: Rules for Effective Storytelling Based on Pixar’s Greatest Films
By Dean Moskovitz

Performing for Motion Capture: A Guide for Practitioners
By John Dower and Pascal Langdale

12 Principles of Animation
General / 09 May 2023
The 12 principles of animation are a group of key teachings for an animator. See and make believable and recognisable movements that help the audience engage more in the character's actions in the animation. These principles refine and developed by Disney's nine old men Les Clark, Marc Davis, Ollie Johnston, Milt Kahl, Ward Kimball, Eric Larson, John Lounsbury, Wolfgang Reitherman, and Frank Thomas, who all started working with initially Disney studio in the 1920s and 1930s. Finally, also, for writing this page, I used the book the animation survival kit by Richard Williams.
Vocabulary:
- Timeline: The series of frames that compose each second sequenced
- Line of action: an invisible line which we can imagine in the picture leading the eye movement in the picture. How the eyes of the audience move in the image and read the story and character information. Relationship between different parts of the character's shape.
- Pose:
- Keys: the main and stronger poses that describe the action.
- Extremes: secondary poses which start and end of action during a change. Of position (the extreme lower or higher or the forward and backward).
- Breakdown: further broken-down poses or passing poison between two keyframes or extremes.
- In Between Poses: all the other frames between the keyframes and the breakdown necessary to improve and better control the action movement of the character.
- Moving Holds the subtle animation, some solo movement in CG animation.
- Smears: deformation of the character shape in a shot or multiple some part of that to emphasise the fast movement of the character.a kind of recreating motion blur.
- Twinning: the body language of poses breaking up symmetric.
1. Squash and stretch
Make objects longer or flatter for:
1- emphasise their speed, momentum, weight, and mass.
2- more squash and stretch display softer objects and more sense of flexibility.
3- shows contrast in changing shape in the movement so the action can be more recognisable.
TIPS:
- Keep the overall volume of objects consistent.
- Squash and stretch do not have to be the entire time.
- It is so crucial to the weight and gravity of the object or character.
2. Anticipation
Anticipation is the energy or driving force behind any action. It prepares and gives a clue to the audience for the following action. Make the movements of the character more readable or lead the viewer to focus and look at that movement; that's made it easier for the audience to understand what is going on. Board and subtle of that depend on the action's type and intensity.
Some examples of anticipation in animation are:
- The entire body squashed down before jumping off a building.
- The heel of the foot presses down before a step
- Mouth compressing before opening to speak.
- An eye blink before a head turn
- A baseball player winds up before the swing.
- A face scrunching up before widening in surprise.
- Multiple levels of anticipation
3. Staging
Staging is presenting any idea so that it is completely and unmistakably clear. That covers many areas of animation, which can apply acting, timing, camera angle, position, and setting. So, you control where the audience is looking to tell your story. We are essentially saying look at this, then look at this, and now look at this. These controls achieve staging in the wrong staging, causing viewers to be confused about where they should look. Above all, good staging is what allows us to read and understand what’s going on in shots.
Character poses
-
(Images: www.dsource.in)
- Camera
- Choose the place of the camera. It depends on
- The idea
- The action
- The expression
- The character’s mood
We can choose some shots like as
- Establishing shot: usually used for knowing where the action is taking.
- Long shot: usually shows the relation of character with the environment.
- Full shot: character in an environment still visible and clear
- Medium shot: upper body character in the background; we can see character gestures and expressions.
- Close-up: usually shows emotions; it’s also used to put something important in the scene.
- POV- Point of view: When we use the camera as the eyes of the character.
- Panning shot:
- Tilt shots:
- High-angle shot:
- Low-angle shot:
- Truck shot:
- Camera shake:
- Focal length:
- Hook up: This is the consistency (gestures, action, expression and speed, camera movement) between a shot and another.

Environment:
TIPS:
- Icrucialtant when being clossuitable (good for expressions) and when it must be suitable significant (good for big action).
- The main action of a scene should be very obvious and simple. It should be don’t upstaged by other things that are going for takes attention from the main point.
- It should have proper timing. For example, it is better to let one action finish before the other person starts their action instead of overlapping them.
- Conveying ideas and making them clear. For example, if the character is angry, you want to ensure the viewer knows and feels that.
- If we have a group of characters talking, one-character talks, and the other listening leads the user’s eye on the character speaking and keeps the other character alive like a little movement, eye blink or changing weight.
- In general, finish an action before starting a new one.
- Using the environment to support the character and action.
4. Straight-ahead action and Pose-to-pose
That describes two methods used to animate drawings.
A. Straight ahead:
Draw the first drawing, then the second drawing, then the third, and so on, basically animated as you go.
Benefits:
- It is good for some unpredictable animation, like fire, water particles, clouds of dust, and explosions.
Another example of unpredictable animation is overlapping action.
Risks:
- Over Animate.
- Lose the readability of the main pose.
- Have more difficulties making changes.
B. Pose to Pose:
Drawing two poses, then go back to drawing in between.
Benefits:
- The most control and doesn’t change the size and shape of your drawing from beginning to end, the same as straight-ahead animation. We will be able to add variations and changes in a few moves.
- Immediately readable.
- You will save time and a lot of work in Straight-ahead animation; if you make a mistake in any part, you must come back and change many drawings.
5. Follow through and overlapping action
This part makes our animation more exciting and believable cations. Follow-through refers to the way part of the body continues to move after the body has stopped and is often associated with another technique called drag. When moving the tip of the appendage, the main character's body should be the last to catch up, and when the body stops, the tip should follow through the farthest before sitting back. Or a character looking to the right to left, the rest of the body follows half of the head, chest, arm and move. All these parts follow the half movement. During this movement, we can have different reactions. For example, one arm can overlap in the opposite direction.
Follow-through: the way parts of the body continue to move after the body has stopped.
Overlapping action: the offset between the timing of the main body and other parts.
Drag: the technique of delaying the movement of body parts in relation to the main body.
TIPS:
It’s easier to add the appendages after the animation of the main body is finished.
When you add hair, for example, use the previous frame as an indicator of where the hair should be stretched toward. Since it has dragged, it should be dragging from where it was in the last frame. Make sure to let the hair follow through when the body comes to a stop.
6. Slow in and Slow out
At the start and end of the movement, smooth the action. This principle is related to Inertia physics law. Any movement needs more energy, not starting to accelerate, and when finished, this energy is decelerated as it reaches to end of the movement. So, in animation, we need more drawing at the beginning of any action and at the end of that.
7. Arc
Any moment we create has its own path. When our animation character generates an invisible arc, that smooth and circulated arc makes our animation more realistic, fluid, and excellent. It also can accentuate the movement weight and speed.
Maya Visualise > Create Editable Motion Trail can help us to create arcs in our animation.
8: Secondary Action
Something To support the main action and make it more natural and interesting or clear the intention and emotion of the character. We can use secondary action to intensify the general filling up of the animation.
We create secondary action for:
- Body movement
- Expressions and facial movements
- Props interaction
(Image: darvideo.tv)
Primary action: the main action that is necessary to describe the story.
Secondary action: To give more depth to the scene, add more information about the character’s personality and make the scene more entertaining.
TIPS:
- We can’t remove the main action because the secondary actions are subordinate to the main action.
- Secondary action must not steal attention from the main action, only fortify it.
- Personality actions are strictly connected to the character’s personality and mood in that scene but also specific to the location and props in the shot.
- Study the body language to add the right gestures to describe the character’s feelings.
9. Exaggeration
Do the movement stronger and more extreme to emphasise it. Exaggeration can be applied to all other principles as well. Exaggeration timing, overlap, squash and squash and stretch and anticipation. It means out of the limit of realism to make the result more instantly readable or interesting for the audience.
- Story: exaggeration of some concepts
- Character design: exaggerating shapes, proportions, and elements.
- Key poses: exaggeration lines of actions or feelings.
- Breakdown: exaggeration of arcs, squash and stretch and breaking the joint.
- Poses: exaggeration of the presentation of a mood or action
- Timing and spacing: exaggerate the contrast between acceleration and deceleration.
TIPS:
- As an animator, we must focus on some of these exaggerations, not all.
- We should keep paying attention on
- The style of the animation.
- The storyline.
- The intention of the scene.
- How much realism do we want? What is the distance of our animation in form and content to reality? Is it Realistic animation, Exaggerated or Super Exaggerated animation?
- An action can start with realism and finishes super exaggeratedly.
- With exaggeration trying to make the action
- Make it more energic.
- Make it clearer and more readable.
10. Solid drawing
Make sure that forms feel like three-dimensional space, with volume, weight, and balance. When designing the character, we use basic solid shapes like spheres, cubes, and cylinders instead of circles, squares, and rectangles. Additionally, drawing the perspective line on the ground helps us track our distance from the camera.
Think about how appropriate the design for this character has.
Another way is don’t draw the symmetrical line because they look flat.
- Volume
- Weight
- Balance
11. Appeal
Making things interesting and appealing to the character depends mostly on designing the story, but we can make it stronger with poses and missions. Emphasise as opposed to making the appeal of character instantly readable.
Blocking Approval
The attention of the shot is clear and readable.
Good timing and an interesting rhythm.
Poses are nice, readable, and perfectly fit the mood of the characters.
Tips:
- At the start, we should spend time thinking about the invention of the shot. Which actions and poses describe the story?
- Avoid adding too many key poses.
- Use breakdowns in the right way to keep attention to arcs, spacing and shapes.
- Use in-betweens moderately; you can add more of them during the refinement.
- Add moving hold at the end of a movement. Slowing down the spacing in the final part of a motion, adding an in-between with a value close to the last one.
- Follow through and overlap with offset.
- Make everything fluid, polish the curves, adjust the spacing, offset some parts, and add details.
- Convert all the keys in spline or auto tangent and define the curves one by one.
12. Timing and Spacing
Timing: The speed and rhythm of the shot.
Spacing: The variation of the speed during the movement.
(Slow spacing, less change in position and fast speaking, more change in position)
these are so important and connect to each other.
Some parts of the movement will happen slower or faster.
How to choose your timing:
1. What type of animation are you going to do?
For example, a bouncing ball needs consideration of
- type of ball.
- Its weight.
- The gravity force.
- Type of contact surface
- …
2. What type of action are you to tell?
3. The character attitudes.
4. The character’s emotions
5. The accent of the dialogue
6. The character design (Weight, Age, …
TIPS:
- Use a stopwatch to time yourself doing the shot, see how your body reacts to a different action and …
- How you move and how fast you reach a certain position.
- Take time to imagine the performance, and try to visualise timing, action, expressions …
Animation Checklist
By
Bader Badruddin and Tom Box
It is an update from 12 principles. But that drove and updated by 12 principles of animation.
A. Solid Posing
Everything is connected.
Cardinal (3D) planes.
With a clear Arc and line of action, the pose has a sense of clue on it, especially Key poses. Hands gesture, like with design ideas, show where the character is.
Is it comfortable, or is it in imbalance?
Staging and solid drawing match together
Spend time on your hands, create a strong pose, drift ten weaker poses, and create a strong pose for each major emotional beat in the scene.
Push your pose. How can I exaggerate this pose more?
B. Contrast
C. Functional Breakdown
D. Anticipation/Leading the eye
E. Timing
F. Visual Rhythm
Resources
Assignment Production – BOOTS
General / 26 April 2023
Assessment Production
BOOT
For my first producing asset, I chose a character called MADMAN. Then, I started creating characters in ZBrush, Body and distinct parts of objects, such as a jacket, trousers, and scarf, separated. When I imported in MAYA, the models were sweet, but the dense meshes in the Object made it challenging to work on. So, I found it easier to create my second Object, the Boot, at the outset in MAYA.
Find a reference: I googled for an acceptable quality image reference of a boot with little detail and easy to make the 3d model. I chose the picture below and tried to analyse it in simple geometrical shapes.

Find a reference
I googled for an acceptable quality image reference of a boot with little detail and easy to make the 3d model. I chose the picture below and tried to analyse it in simple geometrical shapes.

First Surface
This time in Maya, I created my model in a low-poly way to simplify a scene.

I am creating the Second part of the Object in the same way.

I created different parts of the Object following the reference with the simplest geometrical shapes.

Following the reference to make the boot sole also object low poly and frequently pressing number 3 bottoms, I wanted to be sure it has soft surfaces.

I Combined all the distinct parts of the Object and then pressed the 3 to make it smoother.

I selected surfaces Green and red by extruding the option or shortcut key Ctrl+E and made a shell for those sections of my Object.

I add a few eyelets on the green surface with poly torus in Maya.
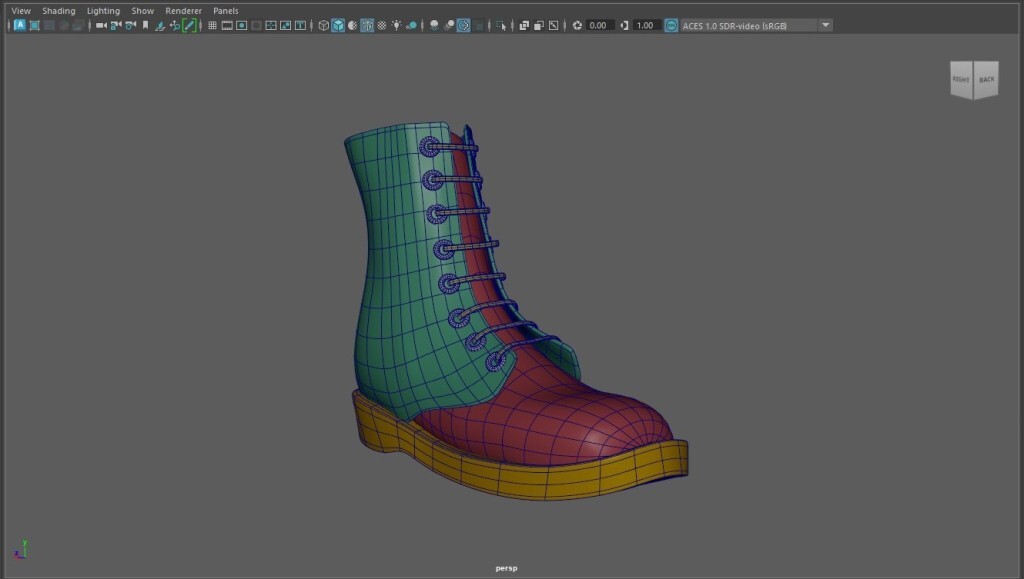
I created those laces with a Maya poly cube and calendar, which I made curved in the edges.

I opened the UV editor by going to Windows > UV Editor, then started selecting different faces of the Object and unwrapping them.

Select a UV shell to Create UVs and adjust all the different faces on a UV map without overlapping each other.

setting my UV map

Firstly, I exported FBX from the Object with its UV map; after that, I imported that file into Substance Painter and baked the Object. Then, I started texturing five parts of the boots, each having a different texture and painting individually.
- Base (Outsole)
- Front surface two
- Back surface one
- NN1(eyelets)

I Used these brushes to make the leather older, dirt, and bumps in sewing parts.
- Stitches Straight: Boots stitches
- Watercolour Spots: Dirt and dust
- Dry Mud: filth
- Cement 1: filth
- Bump: Clouds

After baking, I have had different layers of my Object. I used Ambient occlusion and Height. Eventually, With Ctrl+Shift + E, I exported my file in size 2048, PNG, 16 bits with the output template Arnold.

In Maya, I imported any of the textures by the substance plugin and assigned them to relevant surfaces object.

Fortunately, the substance plugin automatically applies textures to objects.

I utilized three primary lights for the Lighting scene: Backlight, Full Light, and Key Light. Additionally, I incorporated an extra colour light for added effect.

In the end, after Lighting, I started to render settings and testing rendering the same as in my previous production Blog explanation and exported full HD image sequences.

Assignment Production - MADMAN
General / 17 January 2023
Assignment Production - MADMAN
I chose to make a 3D human character for my first 3D object assessment. In the beginning, I remembered reading somewhere that if you want to create a character, you should even know what they usually do if they want to go for a walk on a Sunday evening. For example, what is he usually wearing? Therefore, I tried to answer these questions.
Who is my 3D character?
What does it look like in form, physical body, and anatomy? Which clothes is he wearing?
What is the personality of the character? What is his name?
So, I respond to them in this.
His name is MADMAN; he is a middle-aged man living in southeast London, an Alcoholic, and a drug dealer. A borderline character who t first looks kind but suddenly becomes aggressive. In fact, I was curious to create a fictional villain like Dr Hannibal (Anthony Hopkins), who at first looks like an ordinary Doctor but is different. Typically, character designs are just typical characters, and the story scriptwriter carries this complexity in the movie, but I designed as a character designer also show this contrasting complexity in my character design. And design a badman, not as cliche character designing of badman with masculine bodies and wimpier teeth, something rapidity we see in 3D character modelling. Eventually, I sketched this character design for MADMAN.

When it comes to creating 3D models, I personally prefer using ZBrush. As someone with a background in traditional sculpting using materials like clay, ZBrush feels more intuitive and comfortable for me compared to 3D software like MAYA. It aligns better with my past experience as a sculptor.

To create my 3D character in ZBrush, I tried to make a simple skeleton at first easily, before locking it into a mash. Then, from the library, I brought up ZSphere.

The skeleton model was created fast, and with individual Spheres, some simple rigs were on it. I could move them, change the model’s pose, and rotate them. This method is handy for all kinds of branching structures. But the type of 3d character I wanted to create with exact, realistic anatomy was complex, and it took much time to add details of anatomy in the face of my character and his body.
 In order to speed up the process of creating my 3D character, I decided to try a different method. I looked through ZBrush LightBox and discovered MaleZPR, a pre-made 3D character with masculine features that fit my requirements. Unfortunately, I faced challenges with the anatomy, facial features, and pose of the character as they did not align with my vision for my character, MADMAN.
With different ZBrush tools, I changed the body and facial anatomy of the character to something I imagined.
- Standard Brush: B+S+T
- Move Brush: B+M+V.
- Inflate Brush: B+I+L.
- Damien Standard Brush: B+D+S
- Clay Brush: B+C+L

I also used the same technique for clothes, especially when I found Current Brush ClothHook, Clothes Twister, and Current Brush Cloths so handy. So, I discovered that ZBrush is better than any other 3D modelling software for making clothes and creased textiles. To create buttons, I utilized the IMM Clothing HardW tool.
 To create buttons, I utilized the IMM Clothing HardW tool.


 Retopology

Regrettably, I had neglected to know why I didn’t bake my model. During the retopology stage, the process became quite complex, particularly when dealing with the inner parts of the 3D model, where the fingers were particularly challenging to retopology. However, I have learned from this experience and will strive to create my future 3D models using simpler, more geometric forms and shapes.


Importing the Model to Substance Painter and texturing


Lighting


Rendering


Rendering
General / 10 January 2023
What is the rendering in the 3D animation process?
Rendering is the final process of creating the 2D image or animation from the prepared scene; in this process, the computer takes raw information from a scene, including Polygons, materials, and lighting for the final output.
Rendering in Maya
- Render setting
- Sampling
- Lock sampling pattern
- Clamping
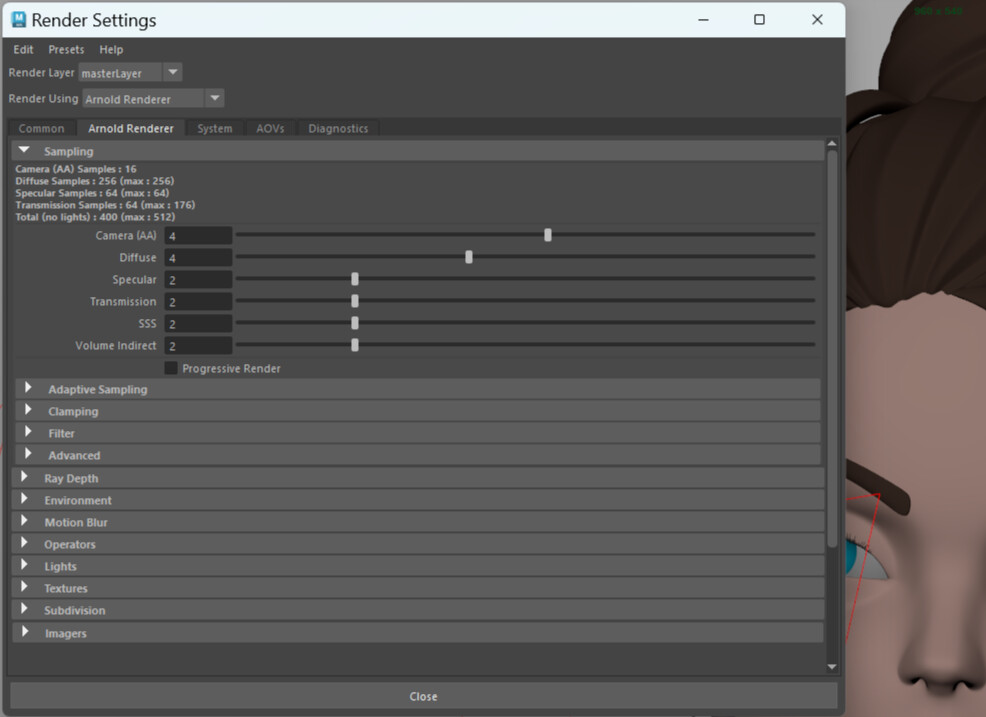
- Sampling
- Lock sampling Pattern
- Clamping
- Rays Explained
- Environment settings
- Motion blur
- Render Sequence and Render menu
- Colour management
Arnold Render
What do rays do?
Diffuse ray Depth
Specular Depth
Environment
Motion Blur
Arnold Shaders
aistandardsurface
aiAmbientOcclusion
aiWireframe
Color Management
Baking
General / 03 January 2023
Baking in Maya and Substance Painter
In simple language, Baking saves information related to a 3D mesh into a texture. The first meshes are transferred onto the second mesh UVs and saved into a texture.
Substance 3D Painter is one of the applications that can read mesh properties and bake them down to a texture. This software can output information like Ambient shadows and surface details variations stored as vector directions, directions, Curvature, and Position.

PBR
General / 03 January 2023
PBR Materials
When I first heard PBR initially, this question came up, what is PBR? After searching on the internet, I found that it is an abbreviation of Physically Based Shading; in computer graphics for rendering images in a way that models the flow of light in the real world how is the interaction of light and materials in an accurate manner. Following my search in Wikipedia about the history of PBR, this website mentioned PBR. Starting in the 1980s, a number of rendering researchers worked on establishing a solid theoretical basis for rendering, including physical correctness. Much of this work was done at the Cornell University Program of Computer Graphics; a 1997 paper from that lab[1] describes the work done at Cornell in this area to that point. The phrase "Physically Based Rendering" was more widely popularised by Matt Pharr, Greg Humphreys, and Pat Hanrahan in their book of the same name from 2014, a seminal work in modern computer graphics that won its authors a Technical Achievement Academy Award for special effects.
The most important thing about PBR shader is that it uses multiple layers. All these layers have been combined for coloured maps for adding surface.

Energy Conservation:
IOR Index of refraction, Fresnel Effect, Microsurfacet, lightly rays.


PBR Shader
Maya Shader vs Arnold Shader
Substance Painter
General / 03 January 2023
Substance Painter Basics
In Setting up the Project for import setting, FBX does not contain any camera and UDIM, so Be sure the option Create a texture best per UDIM and Camera is disabled.
Navigating the views is the same as Maya; we also have a 2d view we can work with it. On the top of the toolbar, we have a flag option to choose and switch to 2d view, 3D view, or both.
In Maya, when we sign each part of materials or mesh parts inside Maya, when imported into the Substance Painter becomes a texture set. Each one of the texture sets can have a shader associated with it and work on it in TEXTURE SET LIST and TEXTURE SET SETTINGS. Additionally, Another essential window is the LAYERS.
